Restoration of ZS-UAD, Tipsy Nipper T66 mk 1

Tell us all about YOUR machine.
Tipsy Flyer
Posts: 140
Location: South Africa

Restoration of ZS-UAD, Tipsy Nipper T66 mk 1

Postby Tipsy Flyer » Sun Nov 25, 2007 7:16 pm

As promised, i will sharing the rebuild of my Nipper with all.
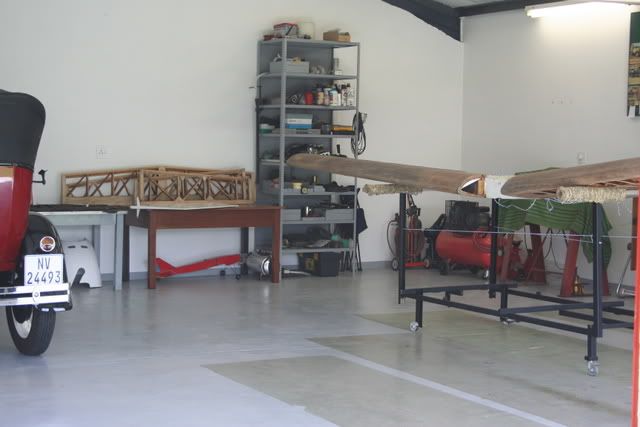
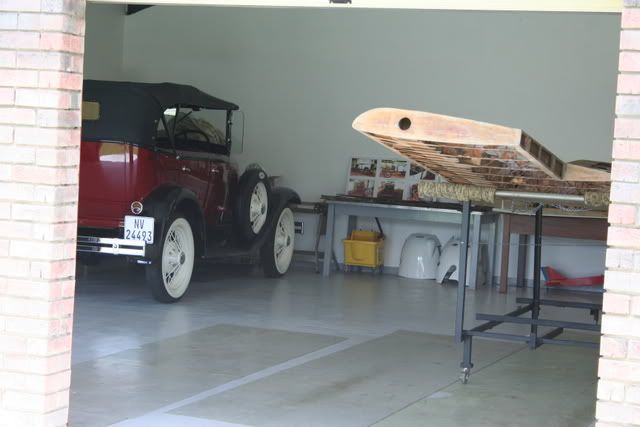
Most important is ones workshop, mine been 9x9 meters=81m2 with epoxied floors and plenty for lights.The workshop is a cool 10 meters from my house's back door therefore can run out and be working in 10 sec flat.
One of the most useful tools i have is a old double v bed South Bend metal lathe. Besides turning things, it is useful to clean and polish items. Besides the lathe, i'v got just basic hand and power tools including a 100 litre compressor. I purchased a cutoff machine recently, now i can cut steel STRAIGHT Very Happy
Here are three pic's of my workshop
[url]Image[/url]

[url][Image/url]

[url]Image[/url]

Comments and critisim are welcome as we travel down the road with this rebuild!!
More tomorrow
Regards
Glen

User avatar
G-NIPR
Site Admin
Posts: 214
Location: INVERNESS, SCOTLAND
Contact:

Re: Restoration of ZS-UAD, Tipsy Nipper T66 mk 1

Postby G-NIPR » Sun Nov 25, 2007 10:02 pm

Hi Glen,
Looks great, could eat your dinner of that floor!
Just one criticism.... you spelt criticism wrong! Ha.
It only seems like yesterday that my wing looked like that, and there I was today flying it!
Stay focussed and think of it all as a series of small jobs..
I'm sure you knew that anyway with your previous restoration experience.
Enjoy the rebuild and keep us updated.

Best wishes,

Paul.
G-NIPR

Tipsy Flyer
Posts: 140
Location: South Africa

Re: Restoration of ZS-UAD, Tipsy Nipper T66 mk 1

Postby Tipsy Flyer » Mon Nov 26, 2007 4:29 pm

Thanks paul, even if it's for the spelling correction, we have 11 official languages, yes 11, therefore my english spelling and grammar is way below par.
How do you eat an elephant.............one bit at a time!!! As you correctly said, one item is a project, complete it, move to the next, so forth !
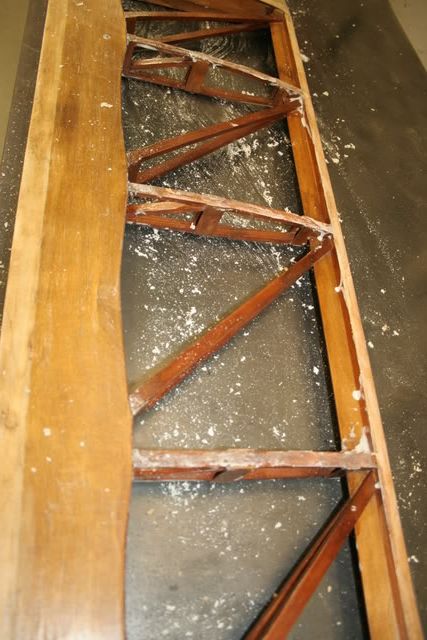
One thing that bothered me when i removed the fabric, was how easily it parted company from the wood and how resistant the remaining glue on the wood was to my effect to remove it. The wing and tailplane were covered when i purchaced my Nipper, so i applied colour and used it as such. I suspect the previous owner had not applied the fabric glue in the right fashion, hence the covering literally "falling off"
One thing that might have contributed to this is that the gluing surfaces for the covering, were vanished. On sanding the wood surface (where the covering glues to), the vanish would turn into a wax type something!! I'm pretty sure all the gluing surfaces should be clean,dry wood etc, Am i correct?
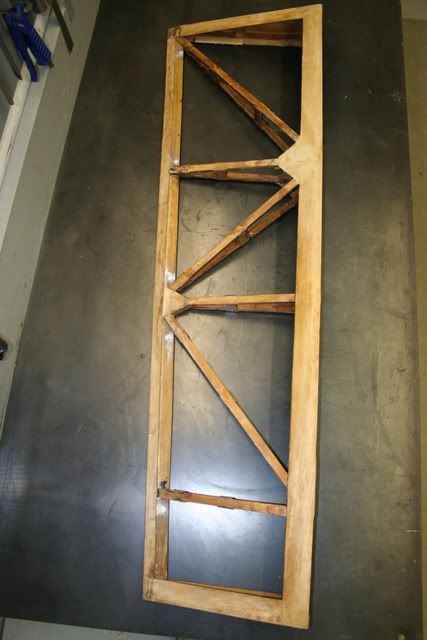
With a little experimenting, i found paint stripper would remove the old glue, followed by a light sanding.
Before
[url]Image[/url]

After
[url]Image[/url]

Chat latter
Glen

Neil Spooner
Posts: 625
Location: Ardleigh, Colchester, Essex, UK
Contact:

Re: Restoration of ZS-UAD, Tipsy Nipper T66 mk 1

Postby Neil Spooner » Thu Nov 29, 2007 10:33 am

Hi Glen,
Love the workshop, wx looks good too!
Good luck with the project, from your workshop and car it looks like you have the right attitude and we look forward to seeing another first class Nipper take to the air.
My only comment (and I am sure it is not needed) is to make sure the paint stripper does not come into contact with the glue holding the structure, and only on the surface the fabric attaches to.
The surface needs to be just as you have shown to provide a good key for the fabric glue. What fabric system are you using?
The paint I used on mine and on many other aircraft restorations which have stood the test of time is a paint that is used for lorry curtain sides! It has a very good flex agent in it which allows the fabric to be folded without the paint cracking. (We have kept samples of inspection cuttouts from aircraft that were done 5 years ago, and the paint is still very flexible, and shows no sign of cracking.) It has a very high gloss finish, and is very sexy to the touch!!
A mod' which you may wish to consider is the seat recline. I would not be able to comfortably fly mine without it as I couldn't get far enough away from the controls to operate them. The PFA has approved this mod', they have my drawings which you are welcome to.
Neil
A little help goes a long way.
Nipper G-BRPM and G-BALS
RV4 G-IKON

Tipsy Flyer
Posts: 140
Location: South Africa

Re: Restoration of ZS-UAD, Tipsy Nipper T66 mk 1

Postby Tipsy Flyer » Sat Dec 01, 2007 7:21 pm

Thanks Neil for the kind words, The wx was great until 13:00, i could have swam around in the back lawn with the huge down pour we had Shocked yes i'm been careful with the paint stripper, lucky it's a semi gel and does not run all over the place
I have not pinned down the type of covering as yet, still must do some more homework as this is a major expense in this part of the world, sorry to say!
I painted my Nipper(10 years ago) with a Duco Duathane K ,which is a 2K paint, adding 30% soft face additive and no cracking. I still have the old wing skins rolled up, will take same pic's tomorrow.
Is that you in that pic busy "taxing" around with the fuse under your armpits, if so, i am not surprised you had to mod the seat etc, you look at lest 8ft tall Shocked
Anyway, here is a few pic's of the tailplane etc been cleaned up. [url]Image[/url]

[/IMG]Image[/url]

[url]Image[/url]

Tipsy Flyer
Posts: 140
Location: South Africa

Re: Restoration of ZS-UAD, Tipsy Nipper T66 mk 1

Postby Tipsy Flyer » Sun Dec 02, 2007 6:12 pm

Hi All,
Today i kept myself busy removing the old fabric glue from the left upper side of the wing
The right upper side was more or less completed yesterday. Will post pic's when there is more to show.
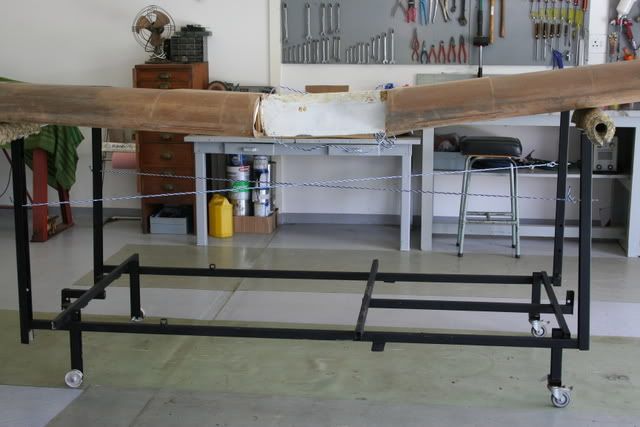
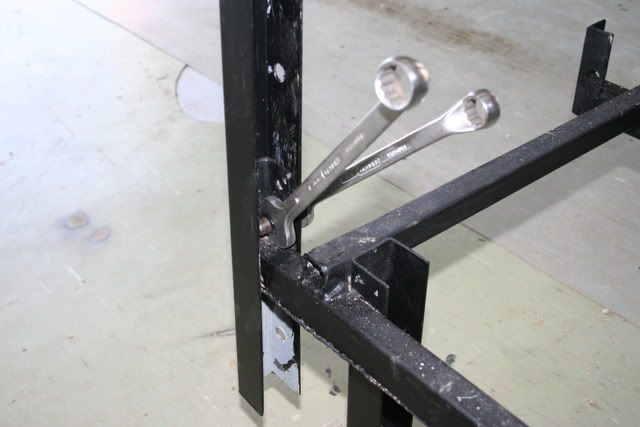
I decided to build a simple wing trolley before i started on the wings. I refuse to grovel on my knee's therefore made the trolley post's at working height. Now as we all know, the Nipper wing is one loong continuous wing with a stiff dash of dihedral thrown in and is not the easiest thing to man handle. The 4 posts on my trolley have a number of holes drilled up the lenght. therefore with the removal one bolt and nut, i can shift the post up or down and place the wing in any position i need at that moment. The rope and eye bolts provide a measure of "stiffeness in lure of metal cross bars.
The complete trolley is built out of scrap pieces of metal, even the bolts are "scrap" 1930 Ford A bumper bolts. Henry will approve, i'm sure, no wasting here Laughing

[img]Image[/img]

[img]Image[/img]

Chat latter
Glen

Tipsy Flyer
Posts: 140
Location: South Africa

Re: Restoration of ZS-UAD, Tipsy Nipper T66 mk 1

Postby Tipsy Flyer » Sun Dec 09, 2007 10:56 am

Not much progress as i successfully managed to flatten my right hand thumb. Ended up with 3 days IOD leave and one hugely swollen thumb, bandaged to protect the wounds. The other 9 fingers are useless without their buddy, the right thumb!!
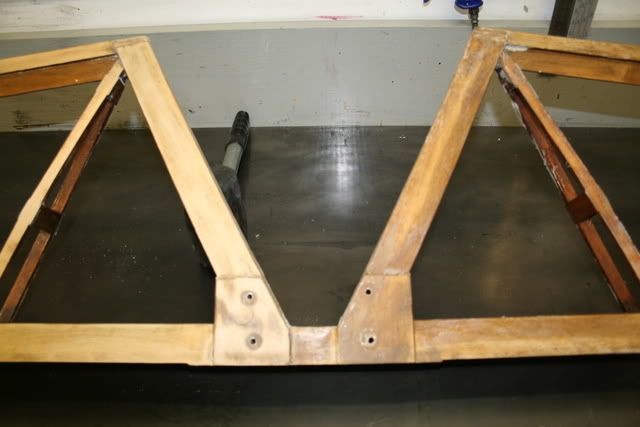
Back to the grindstone, i have tackled the spar centre section, amazing how many nooks and crannys there are to clean etc. The plywood Mr Tips used when, is dam hard, have worn out a lot of sand paper before i get the surface the way I want it!!
Here is a pic of the top of the spar leading onto the rib, all nice and clean.
IMG_2157.JPG
IMG_2157.JPG (33.73 KiB) Viewed 25916 times

Tipsy Flyer
Posts: 140
Location: South Africa

Re: Restoration of ZS-UAD, Tipsy Nipper T66 mk 1

Postby Tipsy Flyer » Sun Dec 09, 2007 10:57 am

One more Very Happy
IMG_2156.JPG
IMG_2156.JPG (25.49 KiB) Viewed 25851 times

Neil Spooner
Posts: 625
Location: Ardleigh, Colchester, Essex, UK
Contact:

Re: Restoration of ZS-UAD, Tipsy Nipper T66 mk 1

Postby Neil Spooner » Sun Dec 09, 2007 11:59 am

Hi Glen,

It's looking great.......sorry to hear about the injury, be sure that if you are going to knock anything now it will be your thumb!!

A little tip.........a hardened flat piece of steel about 3 inches by 5 inches with the edges ground square is very usefull as a form of scraper. A piece of 4130 is quite good. Draw the scraper along the surface of the wood in the direction of grain to remove the majority of the varnish, and finish with glass paper or "wet and dry" used dry. The scraper can be sharpened on a stone, grinder or belt sander, it is much more economical than paper, and can get right into any corners. I have rubbed through the skin of my fingers a number of times using wet and dry, very painfull, but great for doing bank jobs!! Laughing

On the topic of bracing wires...........if you do use the "p" clips use a locktite product or similar to ensure they don't move from the end of the transverse fuselage tube. It would be interesting to do a test on the ridgidity of the fuselage by anchoring the fuselage at the front, and applying a twisting force to the stern post before and after the installation of the bracing wires. Remember, if you use a fixed form of bracing, eg brazing the wires to the top of the longerons as per the original, make sure the fuselage is straight before installation, they can affect the twist and bend of the fuselage once installed.

Neil
A little help goes a long way.
Nipper G-BRPM and G-BALS
RV4 G-IKON

Tipsy Flyer
Posts: 140
Location: South Africa

Re: Restoration of ZS-UAD, Tipsy Nipper T66 mk 1

Postby Tipsy Flyer » Sun Dec 09, 2007 5:03 pm

Hi Neil,
The thumb has learned to stay out of the wars for the moment Very Happy
I have two scrapers, one the was my grandpa's so must be 50 years old, it is made of spring steel. The other is a putty knife/scraper, shorter and wider. Between these two, i seem to be managing.
Luckly for me, i have a few months before i have to double cross Very Happy the bridge with respect to the bracing wires. Must complete all the woodwork etc first.
Neil, here is a pic of the paint/ fabric applied more than 10 years ago that i promised you.
No cracks, or fading Very Happy
IMG_2193.JPG
IMG_2193.JPG (21.6 KiB) Viewed 25865 times

Neil Spooner
Posts: 625
Location: Ardleigh, Colchester, Essex, UK
Contact:

Re: Restoration of ZS-UAD, Tipsy Nipper T66 mk 1

Postby Neil Spooner » Mon Dec 10, 2007 8:37 pm

Hi Glen,

Looks like its good stuff.

Neil Smile
A little help goes a long way.
Nipper G-BRPM and G-BALS
RV4 G-IKON

Tipsy Flyer
Posts: 140
Location: South Africa

Re: Restoration of ZS-UAD, Tipsy Nipper T66 mk 1

Postby Tipsy Flyer » Sun Dec 16, 2007 4:37 pm

I removed the wing root ply skins as their were "badly" replaced by the previous owner.
The original ply skins were 1.5mm 3 ply, i have made new ones from 2.0mm 4 ply.
Two reasons:
I cracked the left skin on the inner edge twice while entering/exiting.
The canopy seal/rubber tends to "buckle" the thin ply slightly causing uneven sealing.
Tomorrow is a public holiday Laughing so i intend to prepare the metal bits that need to be replaced before i glue down the root skins

IMG_2214.JPG
IMG_2214.JPG (37.25 KiB) Viewed 25813 times


IMG_2213.JPG
IMG_2213.JPG (26.6 KiB) Viewed 25755 times

Neil Spooner
Posts: 625
Location: Ardleigh, Colchester, Essex, UK
Contact:

Re: Restoration of ZS-UAD, Tipsy Nipper T66 mk 1

Postby Neil Spooner » Mon Dec 17, 2007 9:11 am

Hi Glen,

What material are your Pitot/Static tubes made from? Mine were copper and very heavy, I replaced them with nylon which were much lighter. By using a hot air gun I could keep the "loop" of tube above the pitot head.

Bert Kupyers introduced proper rod ends to his aileron push-pull rods, looks good and obviously much harder wearing.

Are you keeping the electric stall warner?

Its looking great.

Neil
A little help goes a long way.
Nipper G-BRPM and G-BALS
RV4 G-IKON

Tipsy Flyer
Posts: 140
Location: South Africa

Re: Restoration of ZS-UAD, Tipsy Nipper T66 mk 1

Postby Tipsy Flyer » Tue Dec 18, 2007 3:34 pm

Hello Neil,
The previous owner did one thing right and that was to install new piping made of a strong, if slightly unflexible nylon . Will try the heat gun trick to convince the piping when i get to reinstalling it, thanks for the tip!
I like the idea of rod ends, one must have as little "play" as possible. The originals where fine when new but mine have a little wear and tear.
You might not believe this, but i have no stall warning and there is no hole in the wing anywhere where the stall warning thing should have been!
Funny thing is, the wing did not have the groove/ gap on the right side where the canopy front bar swivels.I have no idea where all my holes/grooves and gaps disappeared to! Very Happy
Regards
Glen

G-ARBG
Posts: 158

Re: Restoration of ZS-UAD, Tipsy Nipper T66 mk 1

Postby G-ARBG » Wed Dec 19, 2007 10:24 am

Glen, Niel

Alloy tube is light and easy to install requiring no bending. The 'pigs tail' above the pitot is easily made using the soft medical instrument tube chosen by glider pilots for all instrumentation and which never goes hard. The original Fairey pitot/static was also made of alloy which meant that the pitot assembly would break before the wing mounting. Slingsby introduced the steel version which had the opposite effect!

David G-ARBG


Return to “THE AIRCRAFT”

Who is online

Users browsing this forum: No registered users and 1 guest